> ## Documentation Index
> Fetch the complete documentation index at: https://nango-wari-integration-config-credentials-api.mintlify.site/llms.txt
> Use this file to discover all available pages before exploring further.
# Atlassian Service Account (API Token) - How do I link my account?
## Overview
To authenticate with Atlassian using service account API tokens, you will need:
1. **Cloud ID** - Your Atlassian site Cloud ID.
2. **Service Account Email** - The email address of your Atlassian service account.
3. **API Token** - Your Atlassian service account API token.
This guide will walk you through finding your Cloud ID and creating an API token for your service account.
### Prerequisites:
* You must have an Atlassian account with admin access
* You must have created a service account
### Instructions:
#### Step 1: Finding your Cloud ID
1. Navigate to [admin.atlassian.com](https://admin.atlassian.com).
2. If you're a member of more than one organization, select your Organization.
3. Select **Apps** > **Sites** from the main navigation.
4. Select the appropriate site as listed.
 5. The **Cloud ID** is listed after `/s/` in your address bar. For example, if your URL is `https://admin.atlassian.com/s/1a11d016-8984-4c3e-b9ab-142dd06acb1b/access-requests`, your Cloud ID is `1a11d016-8984-4c3e-b9ab-142dd06acb1b`.
#### Step 2: Finding your Service Account Email
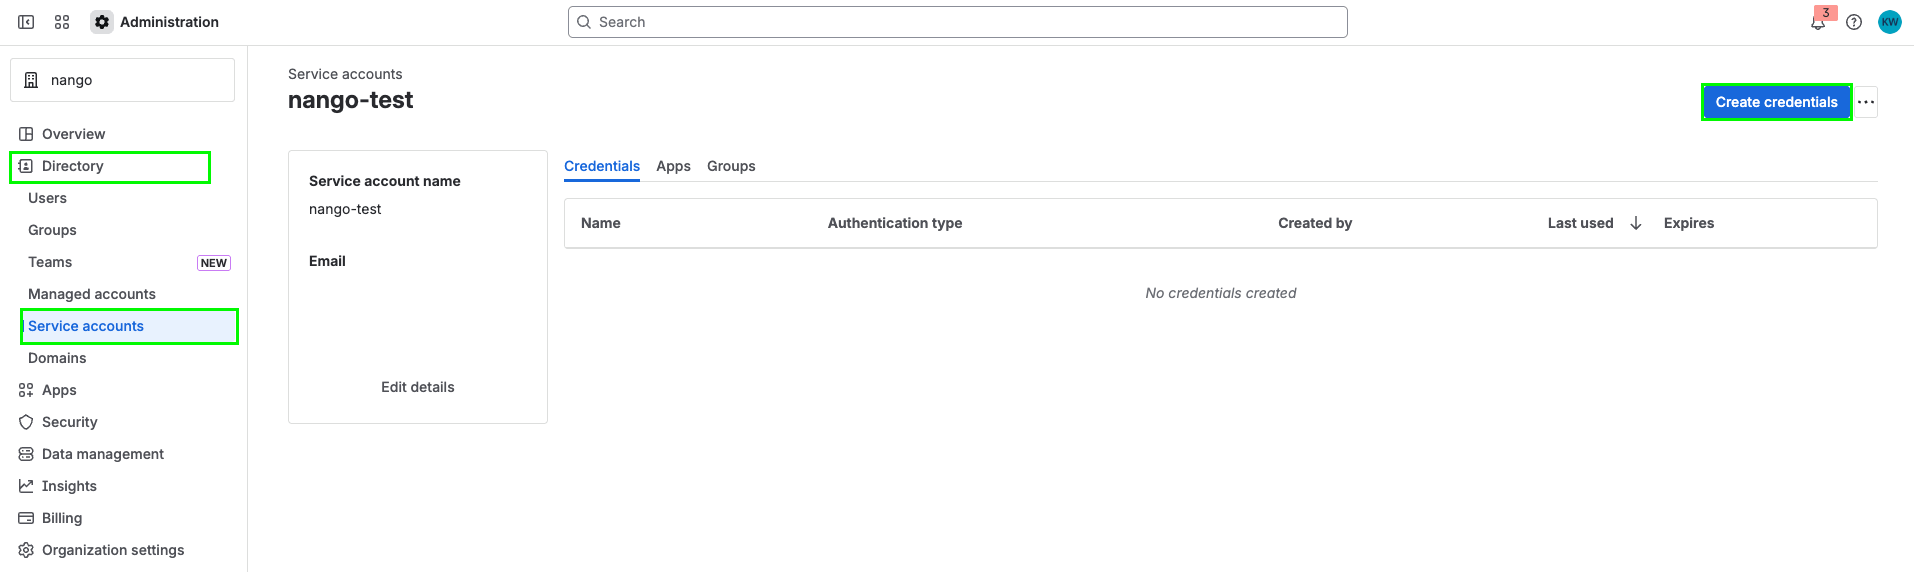
1. Select **Directory** > **Service accounts**.
2. Select the service account you want to use.
3. The service account email will be displayed in the service account details. It typically follows the format `bot@serviceaccount.atlassian.com` or similar.
5. The **Cloud ID** is listed after `/s/` in your address bar. For example, if your URL is `https://admin.atlassian.com/s/1a11d016-8984-4c3e-b9ab-142dd06acb1b/access-requests`, your Cloud ID is `1a11d016-8984-4c3e-b9ab-142dd06acb1b`.
#### Step 2: Finding your Service Account Email
1. Select **Directory** > **Service accounts**.
2. Select the service account you want to use.
3. The service account email will be displayed in the service account details. It typically follows the format `bot@serviceaccount.atlassian.com` or similar.
 #### Step 3: Creating an API Token
1. Select **Directory** > **Service accounts**.
2. Select the service account you want to create a token for.
3. Select **Create credentials**.
#### Step 3: Creating an API Token
1. Select **Directory** > **Service accounts**.
2. Select the service account you want to create a token for.
3. Select **Create credentials**.
 4. Select **API token**, then select **Next**.
 5. Give your API token a name that describes what it does. Select an expiration date for the API token (token expiration can be between 1 and 365 days). Select **Next**.
6. Select scopes to determine what the API token can do in Jira or Confluence. Select **Next**.
5. Give your API token a name that describes what it does. Select an expiration date for the API token (token expiration can be between 1 and 365 days). Select **Next**.
6. Select scopes to determine what the API token can do in Jira or Confluence. Select **Next**.
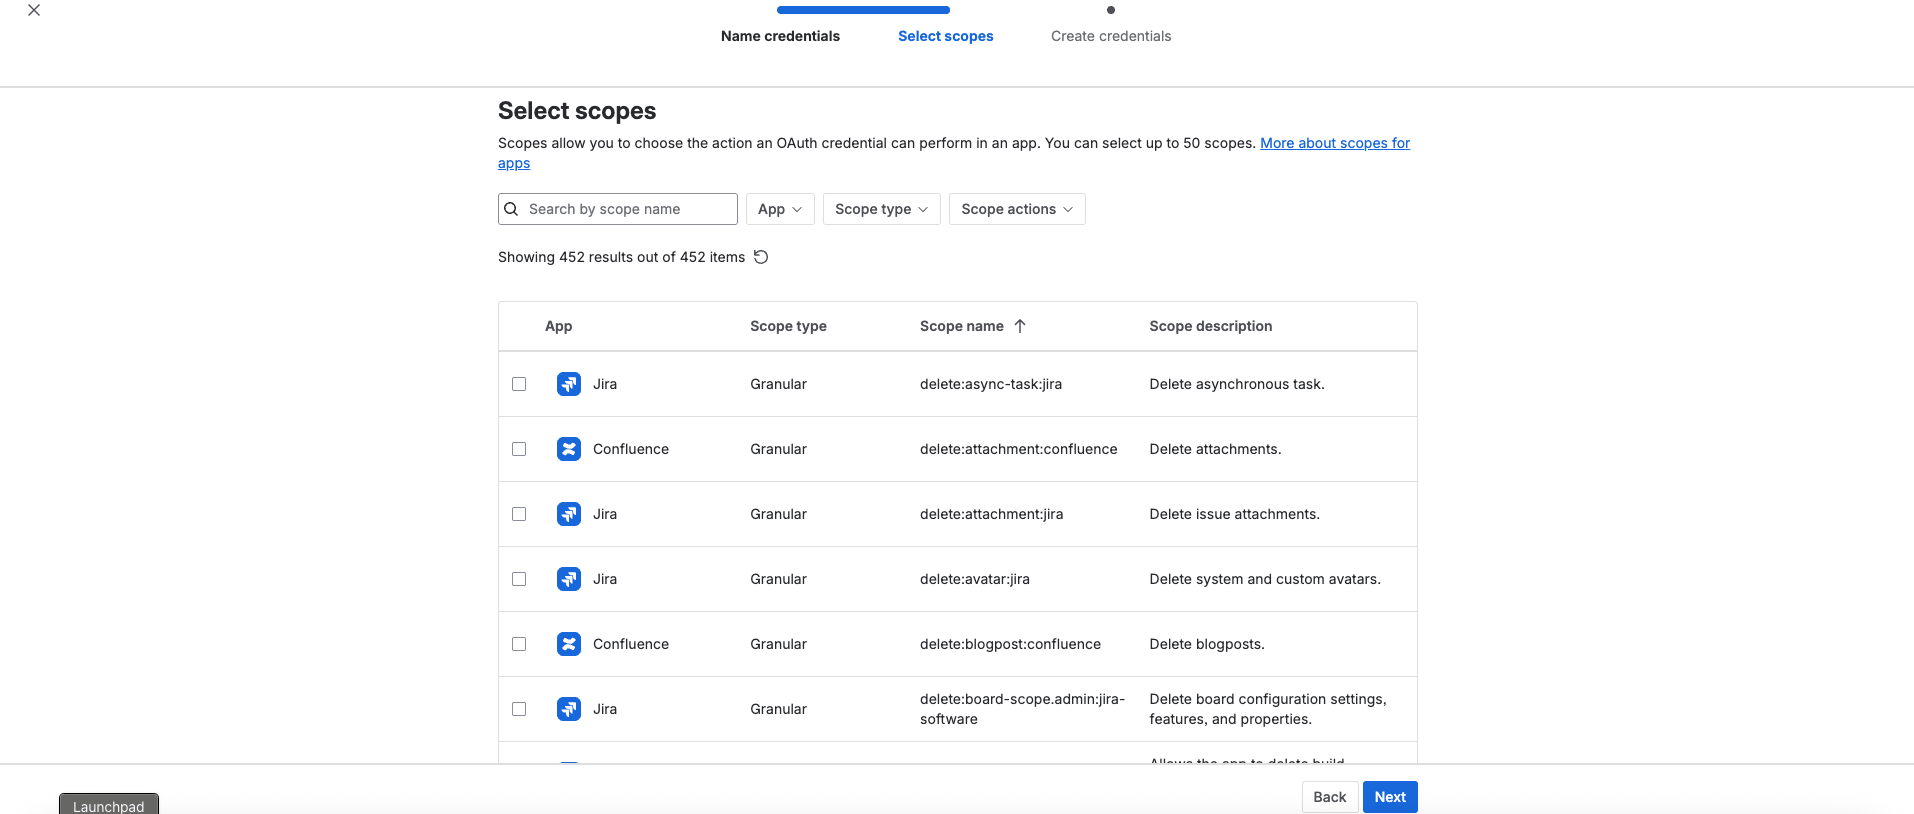 7. Review your API token, then select **Create**.
 8. Select **Copy to clipboard**, and save it somewhere safe.
Store your API token securely. You can't recover the API token after completing this step.
#### Step 4: Enter credentials in the Connect UI
Once you have your **Cloud ID**, **Service Account Email**, and **API Token**:
1. Open the form where you need to authenticate with Atlassian Service Account (API Token).
2. Enter your **Cloud ID**, **Service Account Email**, and **API Token** in their respective fields.
3. Submit the form, and you should be successfully authenticated.
8. Select **Copy to clipboard**, and save it somewhere safe.
Store your API token securely. You can't recover the API token after completing this step.
#### Step 4: Enter credentials in the Connect UI
Once you have your **Cloud ID**, **Service Account Email**, and **API Token**:
1. Open the form where you need to authenticate with Atlassian Service Account (API Token).
2. Enter your **Cloud ID**, **Service Account Email**, and **API Token** in their respective fields.
3. Submit the form, and you should be successfully authenticated.
 You are now connected to Atlassian using service account API tokens.