> ## Documentation Index
> Fetch the complete documentation index at: https://nango-wari-integration-config-credentials-api.mintlify.site/llms.txt
> Use this file to discover all available pages before exploring further.
# ImmyBot - How do I link my account?
## Overview
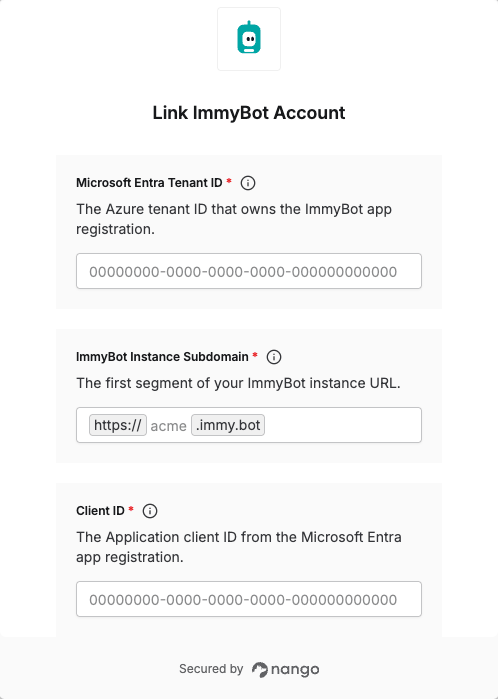
To authenticate with ImmyBot, you need:
1. **Microsoft Entra Tenant ID** - The Azure tenant ID that owns your ImmyBot app registration
2. **ImmyBot Instance Subdomain** - The first segment of your ImmyBot instance URL
3. **Client ID** - The Application client ID from your Microsoft Entra app registration
4. **Client Secret** - A client secret value from your Microsoft Entra app registration
### Prerequisites:
* Access to your ImmyBot tenant as an administrator.
* Permission to create or manage Microsoft Entra app registrations.
* Permission to add a Person and User in ImmyBot.
### Instructions:
#### Step 1: Create or find your Microsoft Entra app registration
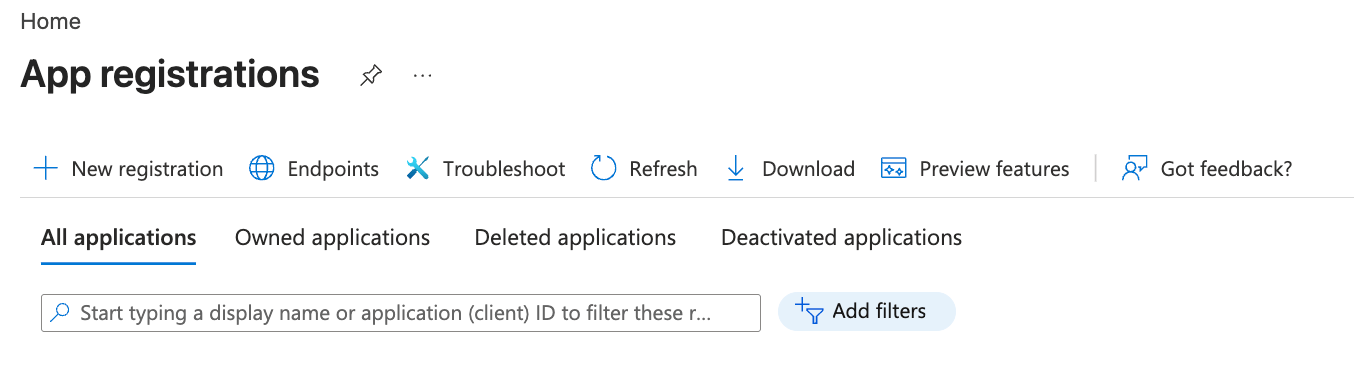
1. In Microsoft Entra, go to **App registrations**.
2. Click **New registration**, or open an existing app registration for ImmyBot API access.
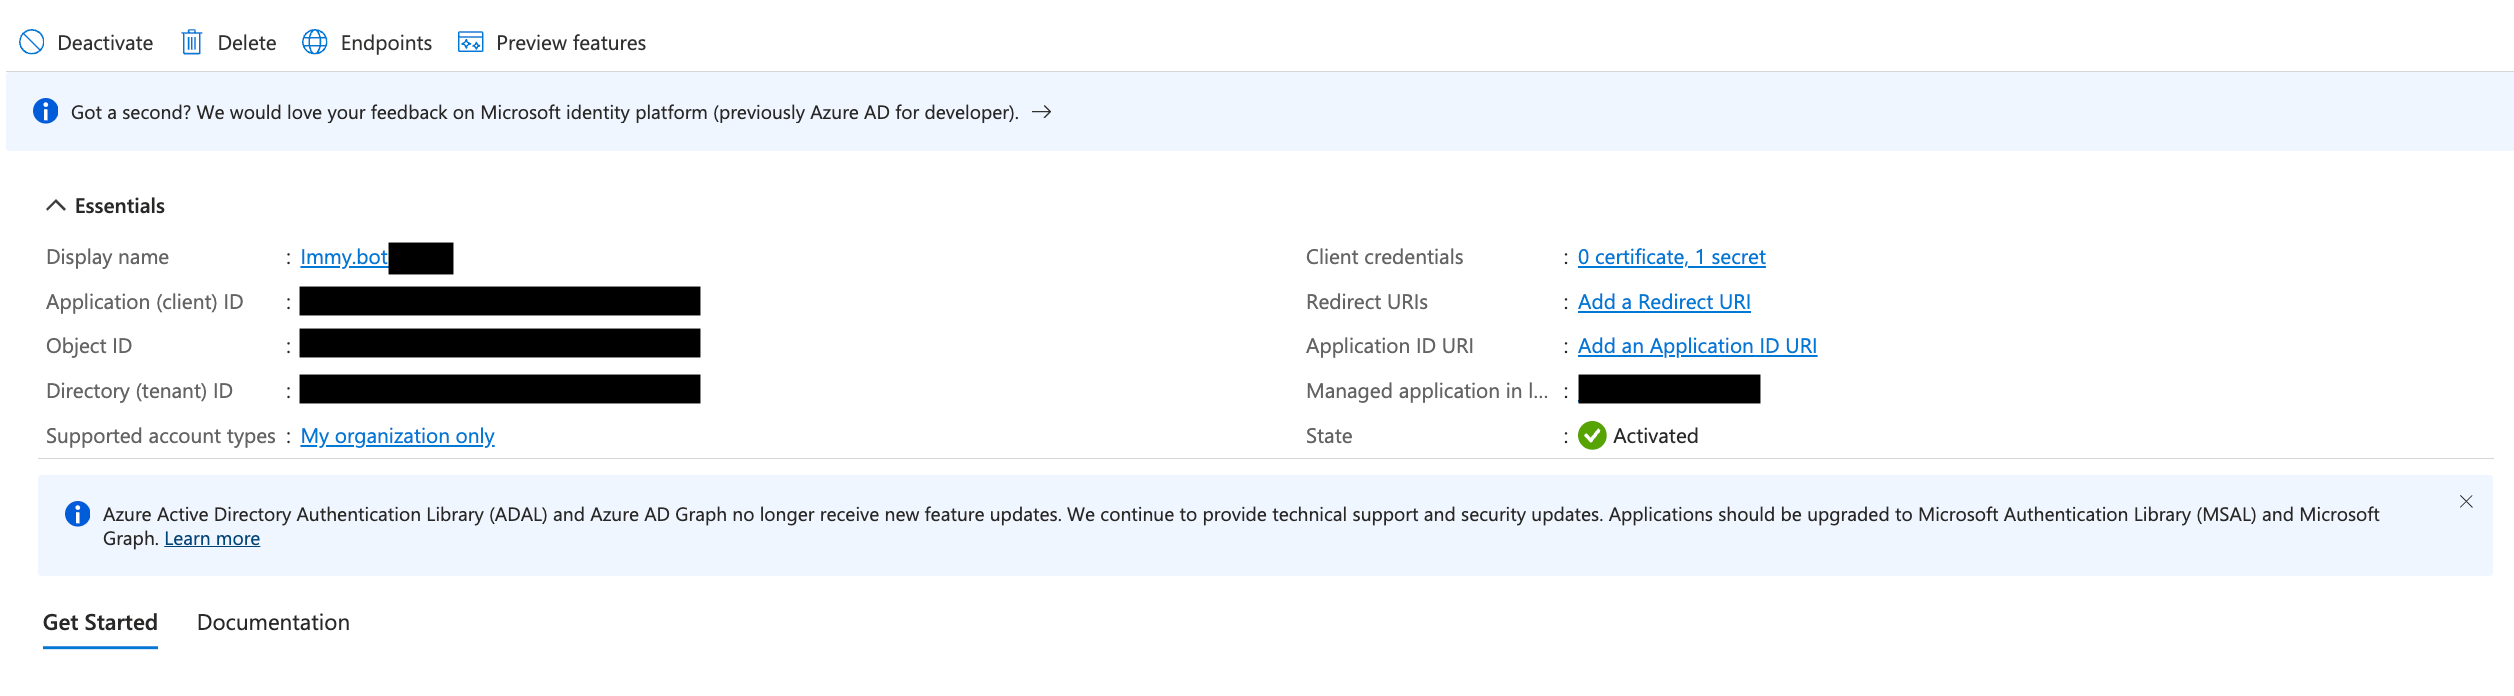
 3. From the app registration overview, copy the **Directory (tenant) ID** and **Application (client) ID**.
 #### Step 2: Create a client secret
1. In the app registration, open **Certificates & secrets**.
2. Create a new client secret.
3. Copy the secret **Value**.
#### Step 2: Create a client secret
1. In the app registration, open **Certificates & secrets**.
2. Create a new client secret.
3. Copy the secret **Value**.
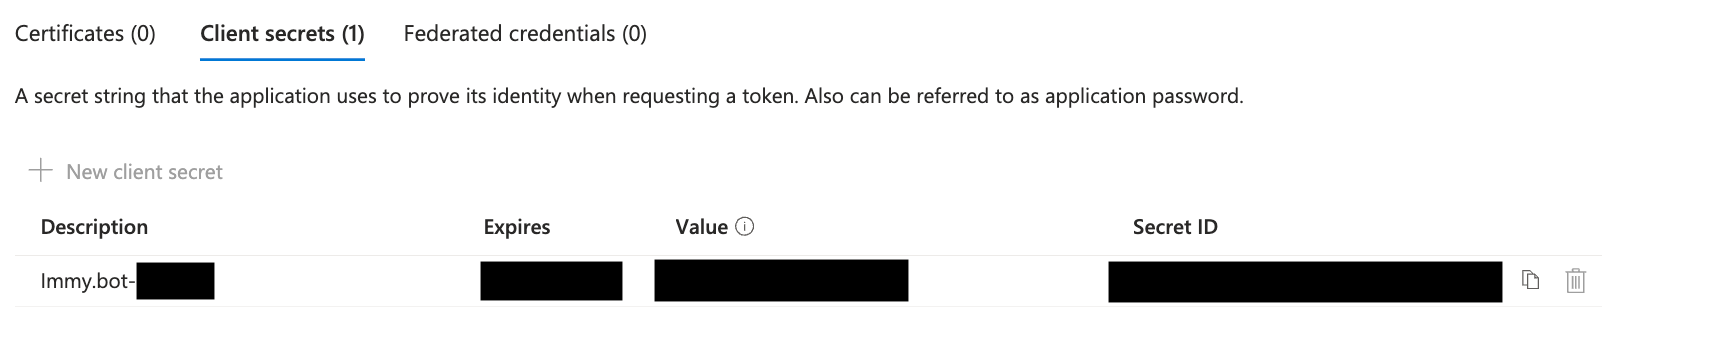 Store the Client Secret securely. Azure only shows the client secret value once.
#### Step 3: Copy the Enterprise Application Object ID
1. From the app registration overview, click the **Managed application in local directory** link.
Store the Client Secret securely. Azure only shows the client secret value once.
#### Step 3: Copy the Enterprise Application Object ID
1. From the app registration overview, click the **Managed application in local directory** link.
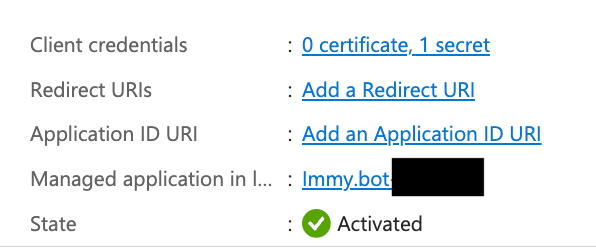 2. On the Enterprise Application properties page, copy the **Object ID**.
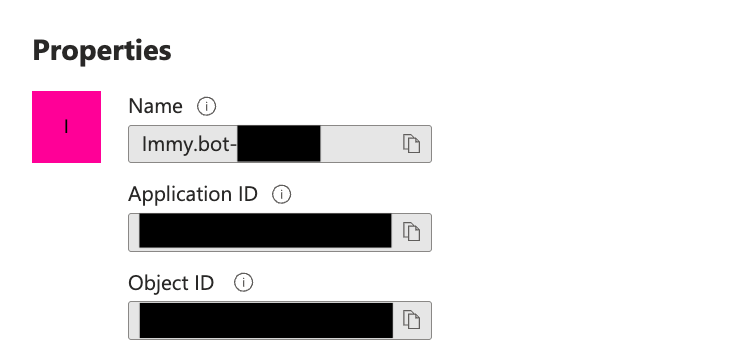 Use the Enterprise Application Object ID for the ImmyBot Azure Object ID field, not the App Registration Object ID.
#### Step 4: Add the Azure service principal as a Person in ImmyBot
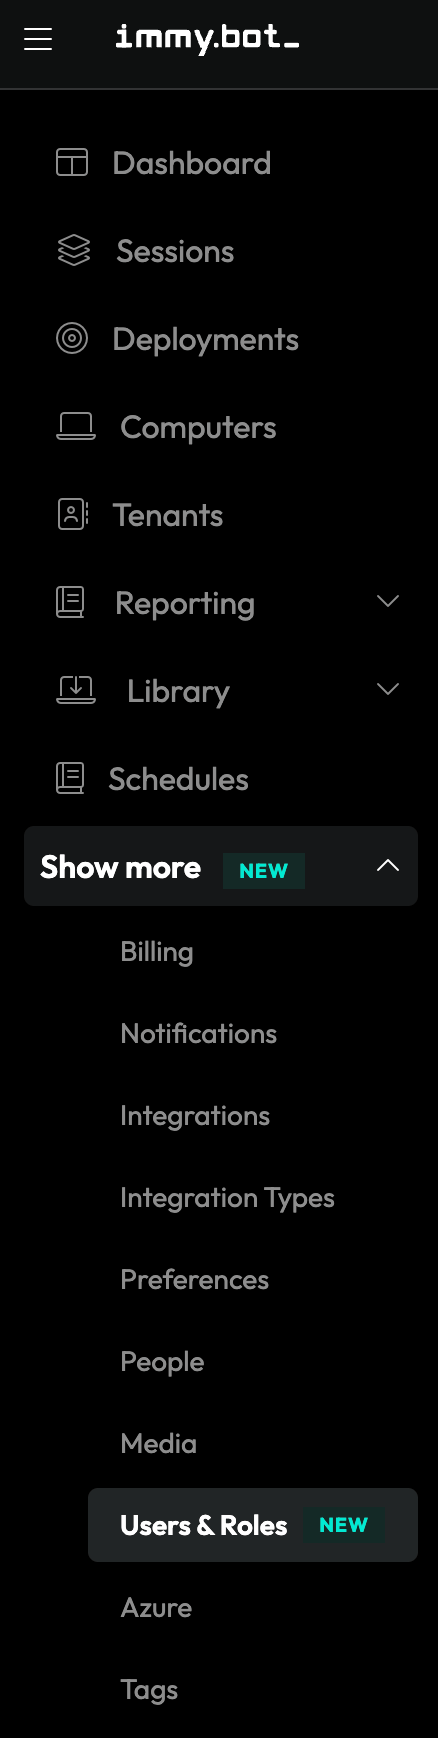
1. In ImmyBot, expand **Show more** in the sidebar and open **People**.
Use the Enterprise Application Object ID for the ImmyBot Azure Object ID field, not the App Registration Object ID.
#### Step 4: Add the Azure service principal as a Person in ImmyBot
1. In ImmyBot, expand **Show more** in the sidebar and open **People**.
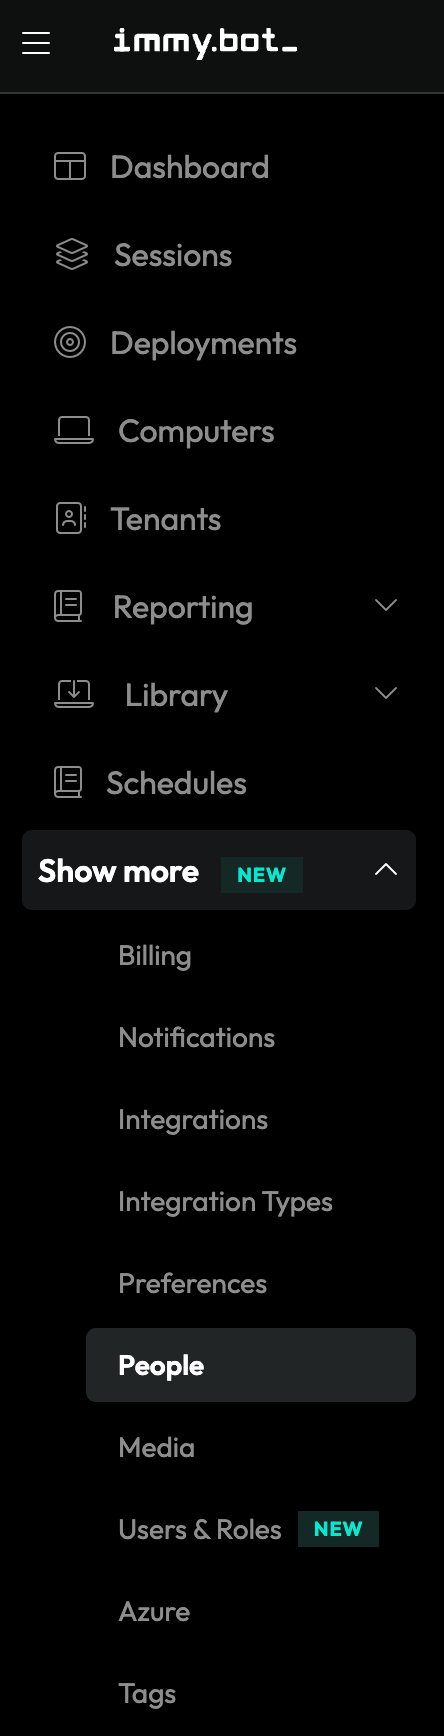 2. Click **New**.
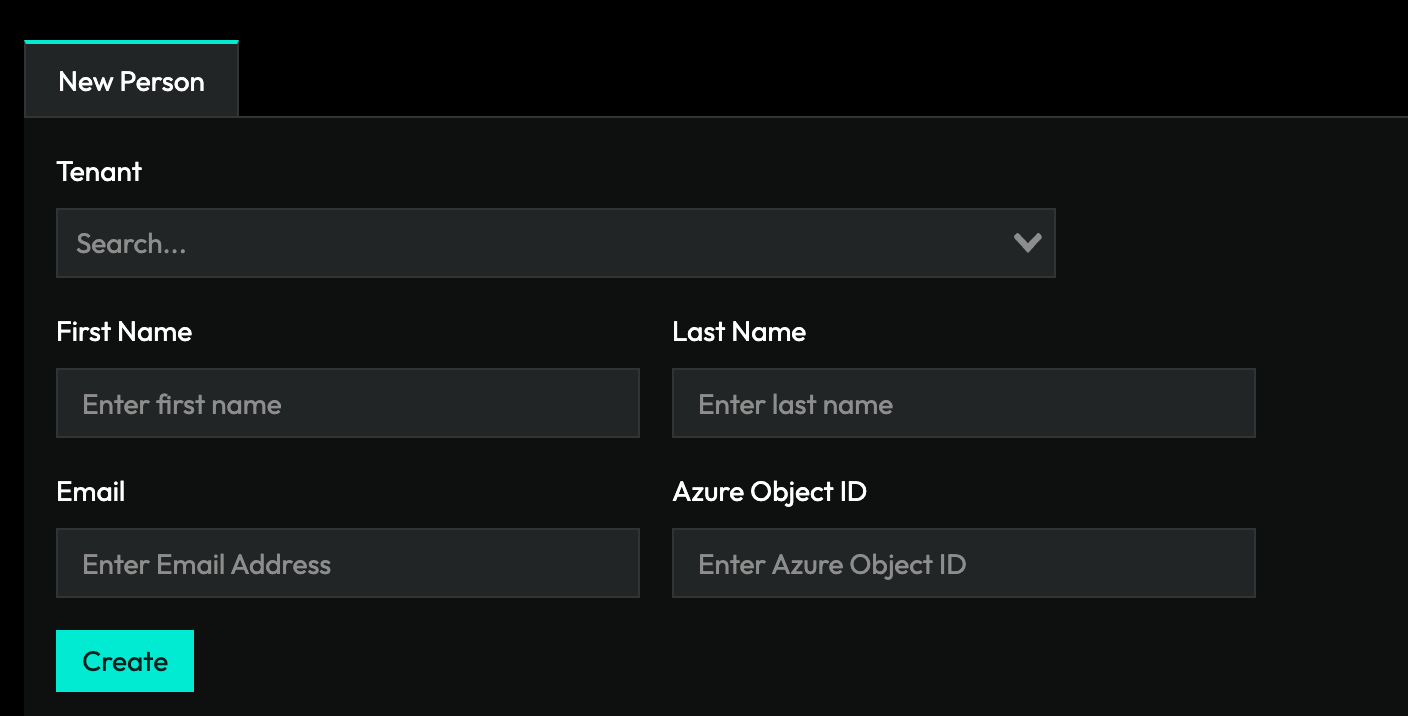
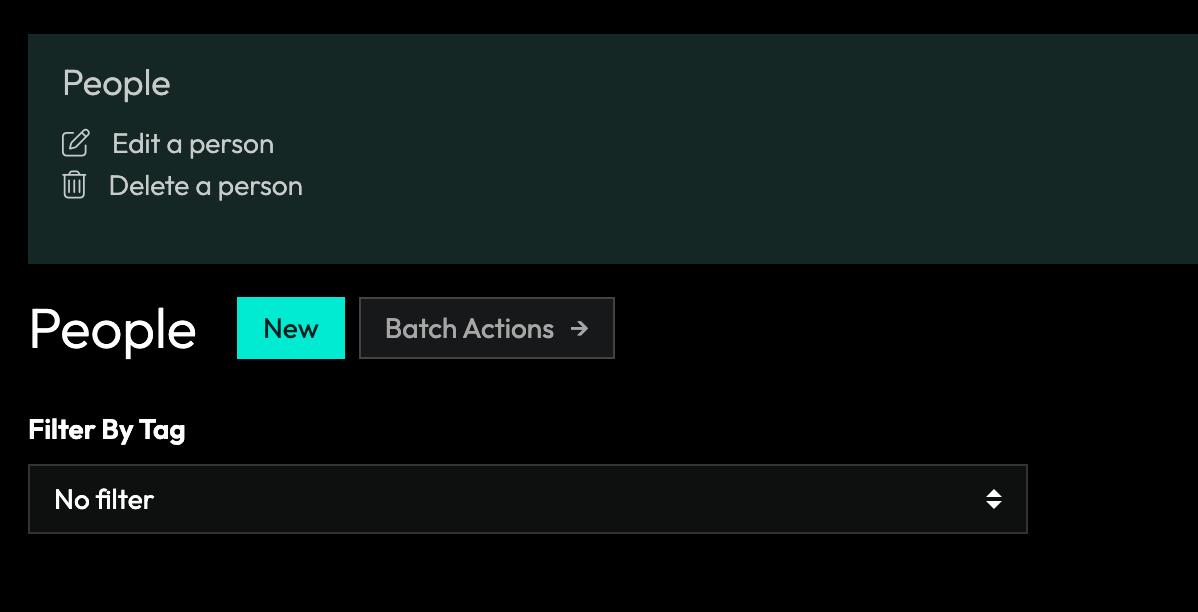 3. Create a Person for the integration. Select the owner tenant, enter a recognizable name and email, and paste the Enterprise Application Object ID into **Azure Object ID**.
 #### Step 5: Create a User and assign an API access role in ImmyBot
1. In ImmyBot, expand **Show more** and open **Users & Roles**.
#### Step 5: Create a User and assign an API access role in ImmyBot
1. In ImmyBot, expand **Show more** and open **Users & Roles**.
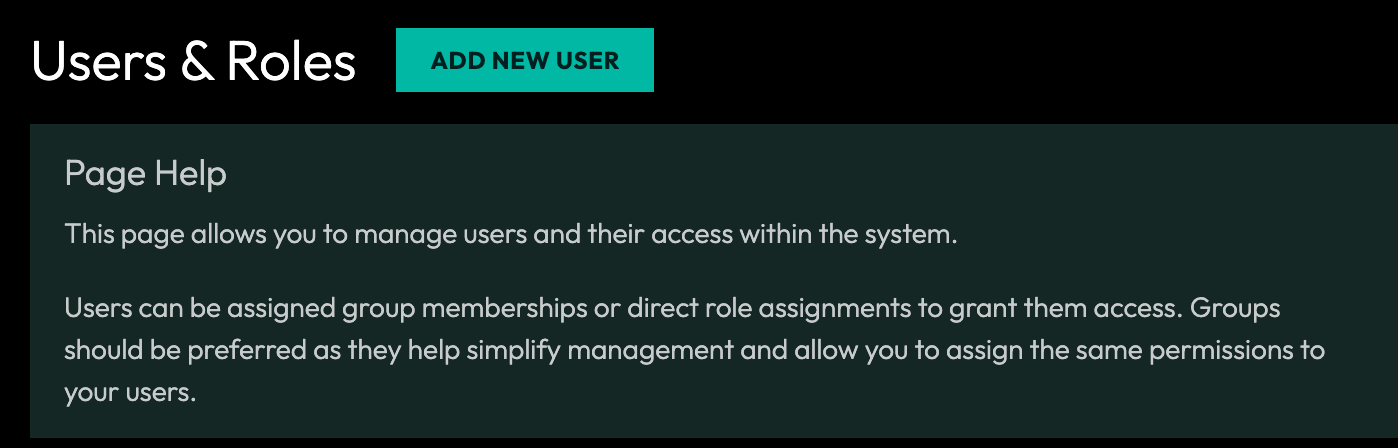
 2. Click **Add New User**.
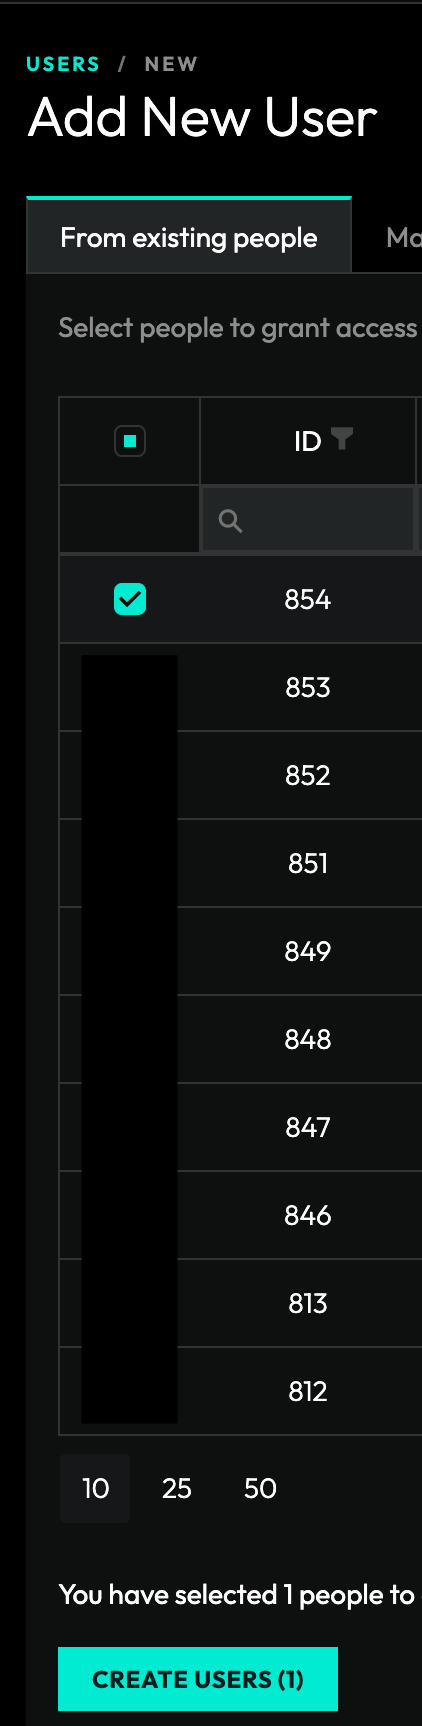
 3. Select the Person you created, then click **Create Users**.
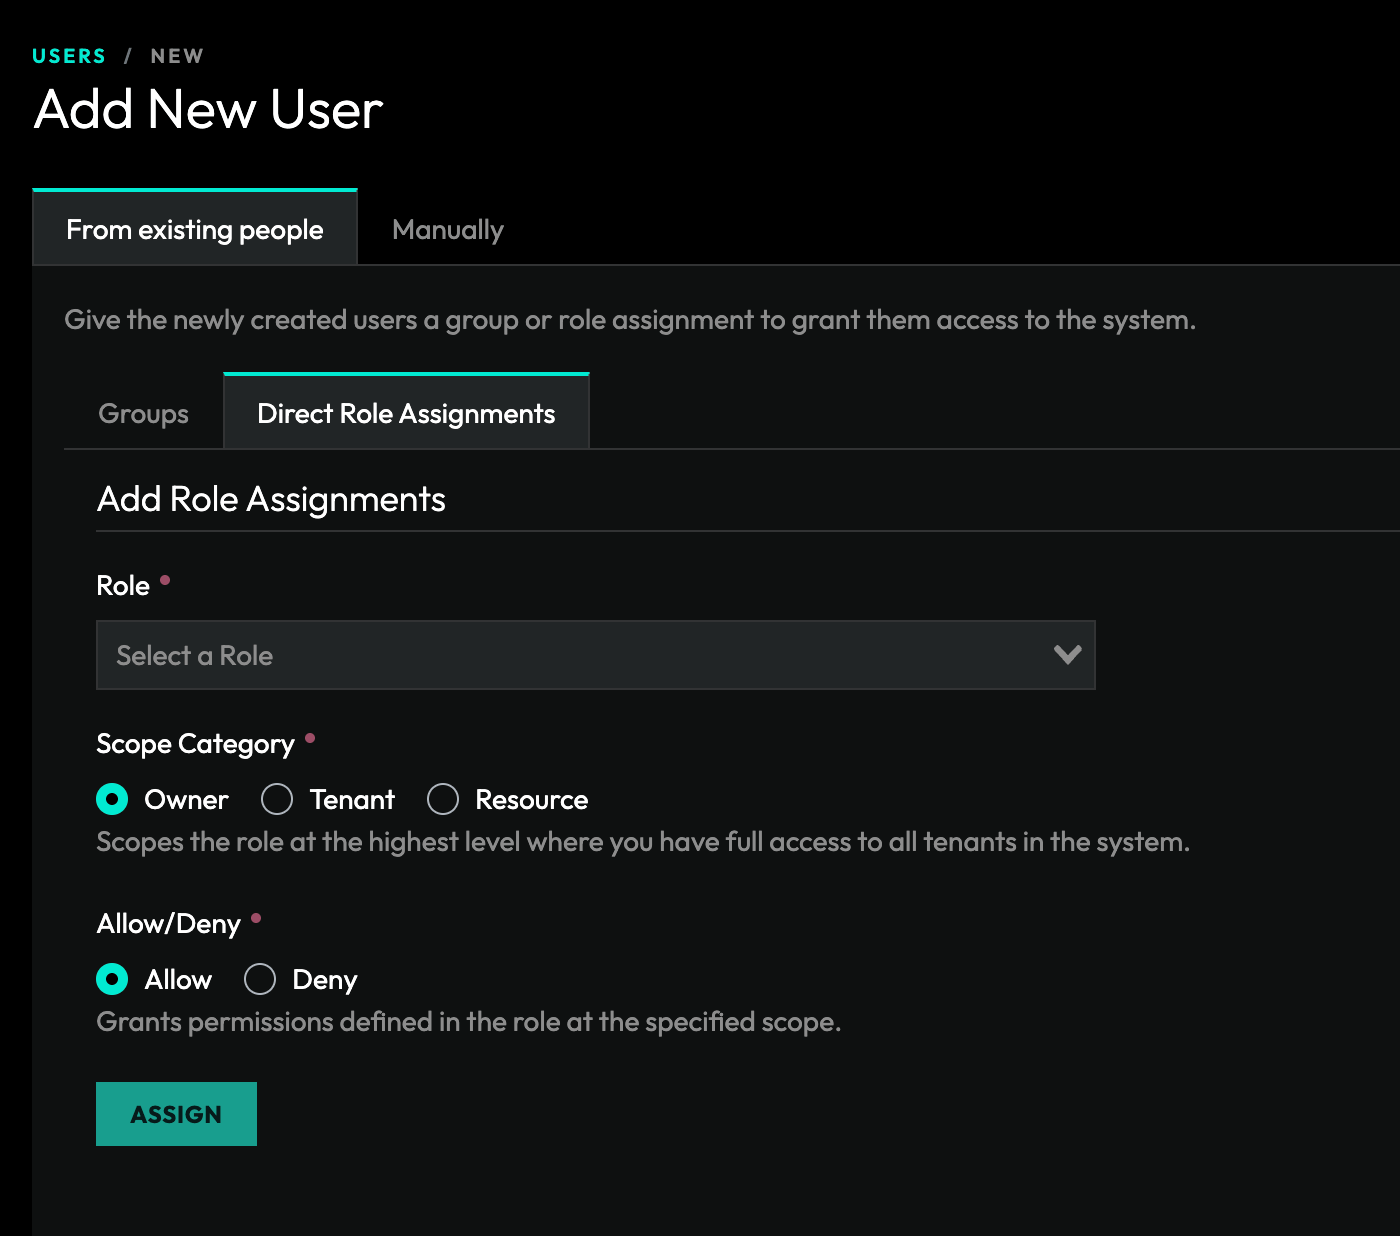
 4. Assign an administrator role that can access the ImmyBot API, such as **System Administrator (Legacy)** or the applicable administrator role for your tenant.
5. Set the assignment to **Allow**, then click **Assign**.
4. Assign an administrator role that can access the ImmyBot API, such as **System Administrator (Legacy)** or the applicable administrator role for your tenant.
5. Set the assignment to **Allow**, then click **Assign**.
 #### Step 6: Find your ImmyBot instance subdomain
1. Open your ImmyBot instance URL.
2. Copy the first segment before `.immy.bot`.
For example, if your ImmyBot URL is `https://acme.immy.bot`, enter `acme`.
#### Step 7: Enter credentials in the Connect UI
Once you have your ImmyBot credentials:
1. Open the form where you need to authenticate with ImmyBot.
2. Enter your **Microsoft Entra Tenant ID**, **ImmyBot Instance Subdomain**, **Client ID**, and **Client Secret** in their respective fields.
3. Submit the form, and you should be successfully authenticated.
#### Step 6: Find your ImmyBot instance subdomain
1. Open your ImmyBot instance URL.
2. Copy the first segment before `.immy.bot`.
For example, if your ImmyBot URL is `https://acme.immy.bot`, enter `acme`.
#### Step 7: Enter credentials in the Connect UI
Once you have your ImmyBot credentials:
1. Open the form where you need to authenticate with ImmyBot.
2. Enter your **Microsoft Entra Tenant ID**, **ImmyBot Instance Subdomain**, **Client ID**, and **Client Secret** in their respective fields.
3. Submit the form, and you should be successfully authenticated.
 You are now connected to ImmyBot.